No blog post yet.

Step 1
Before disassembling the battery on the iPhone 8 Plus, you have to turn it off.
Press the power button on the right side of the phone for a few seconds.
Then slide right to power off
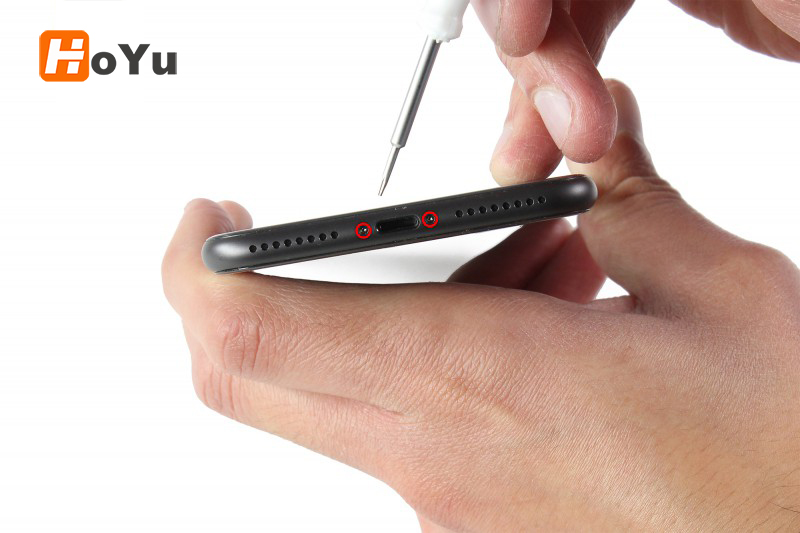
Step 2
Use the pentalobe screwdriver included instandard tool kitin order to remove the bottom screws of the iPhone.
Those screws are on both sides of the dock connector.
Those screws secure the bottom part of the screen onto the frame.
With the hair dryer, heat up the edges of the screen as shown on picture 2.
This will soften the glue between the screen and the frame.
Note :don't hesitate to it up more to make it easier

Step 3
Insert the opening pick in the bottom right part of the phone and slide it on the bottom part.
Repeat that step on both left and right side of the phone.
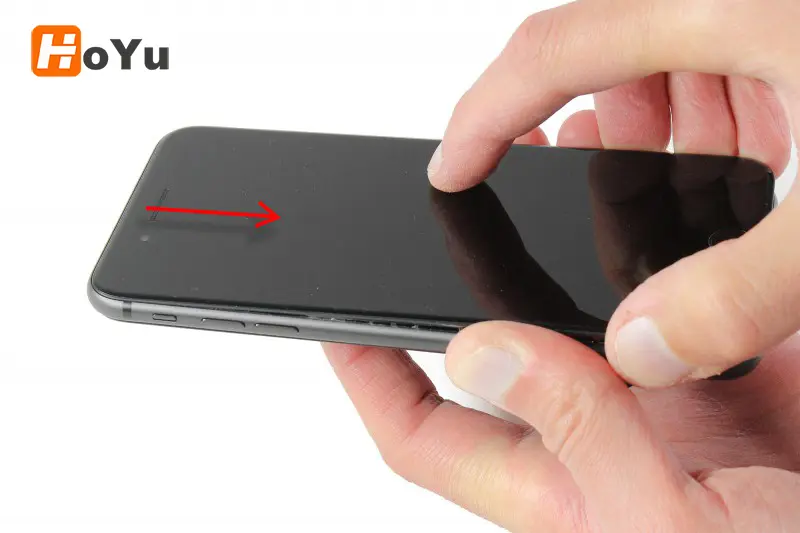
Step 4
Then slide and gently pull the screen as shown on picture 1 and 2 of that step.
Open it as you would open a book. Careful not to tear the three cable linked to the logic board.
Step 5
With the cruciform screwdriver, remove the four screws securing the LCD screen bracket.
Step 6
Remove the connectors bracket.
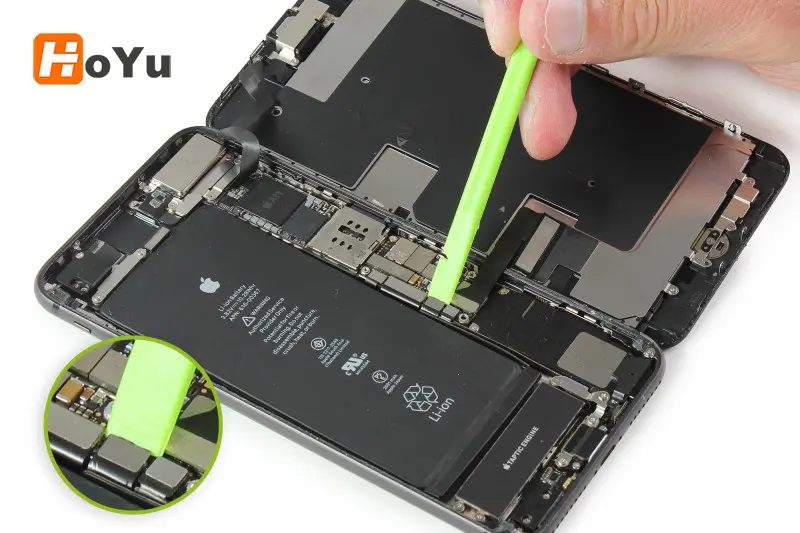
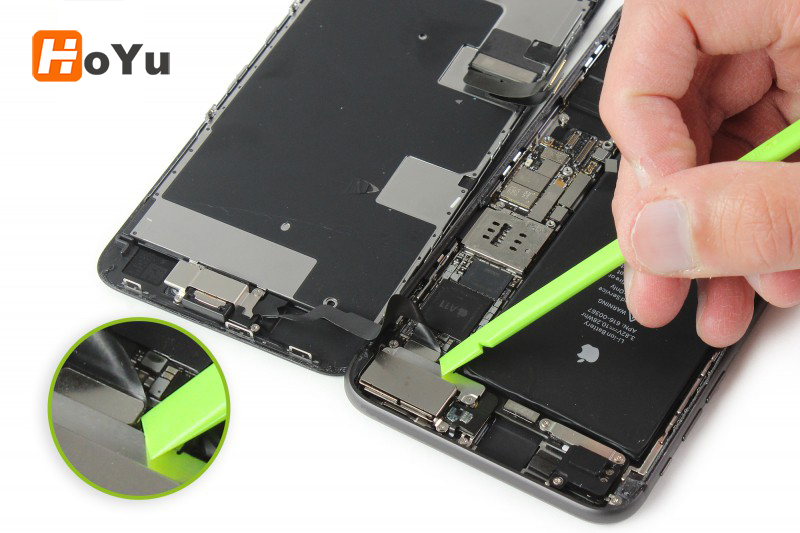
Step 7
With a nylon spudger, disconnect the battery and unlock the LCD /touch screen cable.
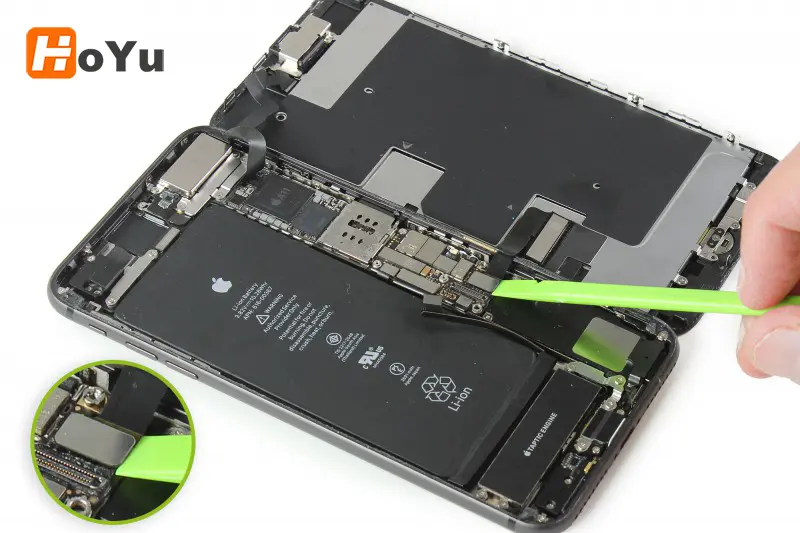
Step 8
Keep using the nylon spudger and disconnect the home button/force touch cable.
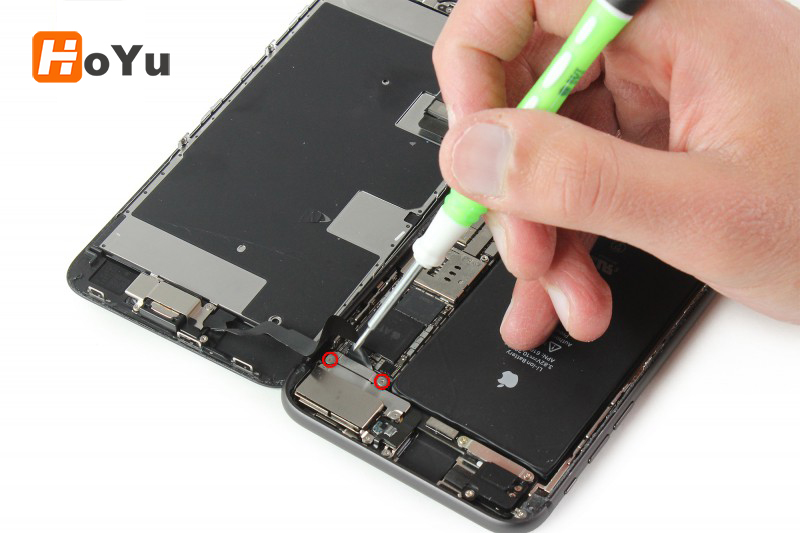
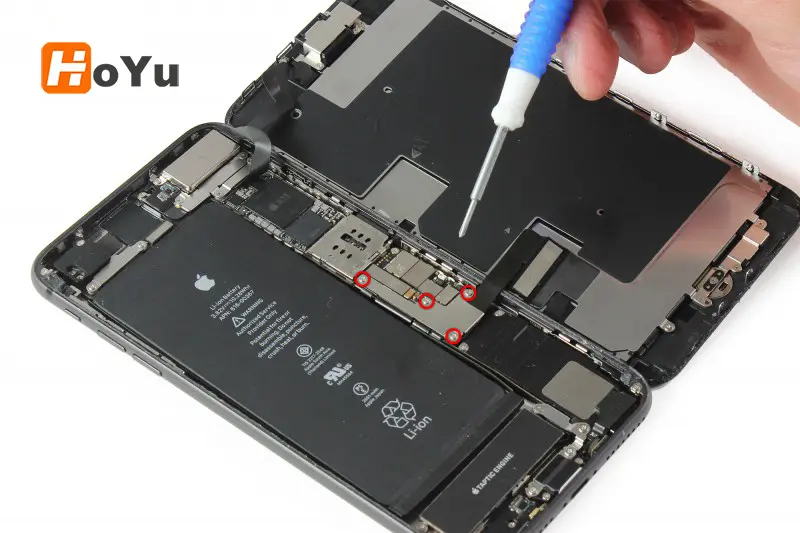
Step 9
With a triwing screwdriver, remove the bracket two screws circled in red that secures the front camera/earpiece speaker/proximity sensor cable connectors.
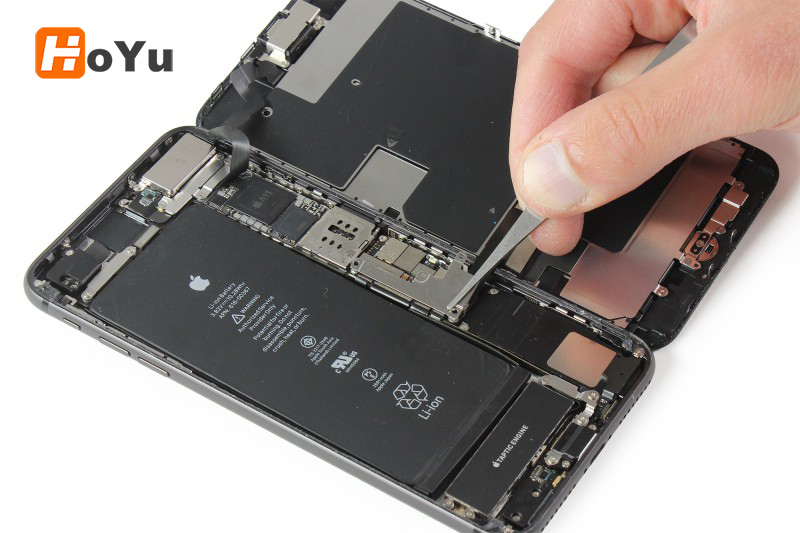
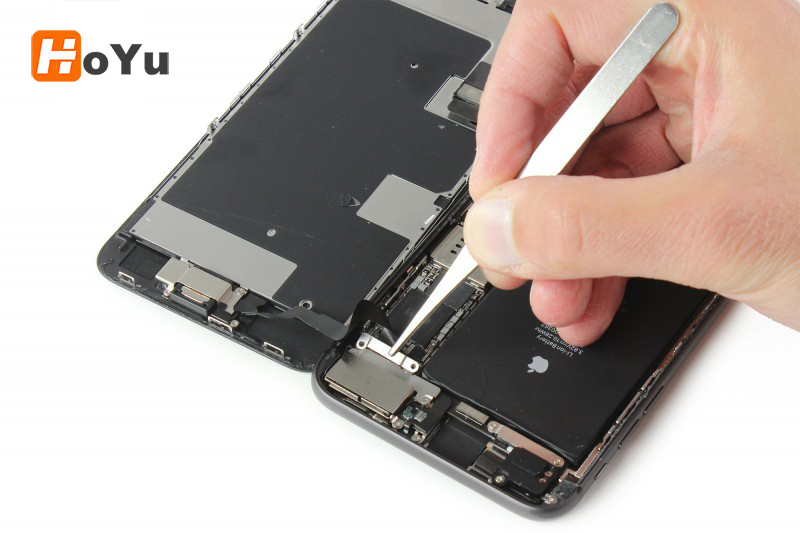
Step 10
Grab that bracket with a pair of tweezers and remove it.
Step 11
Now disconnect the front camera/earpiece speaker/proximity sensor cable with the nylon spudger.
The screen is now disassembled
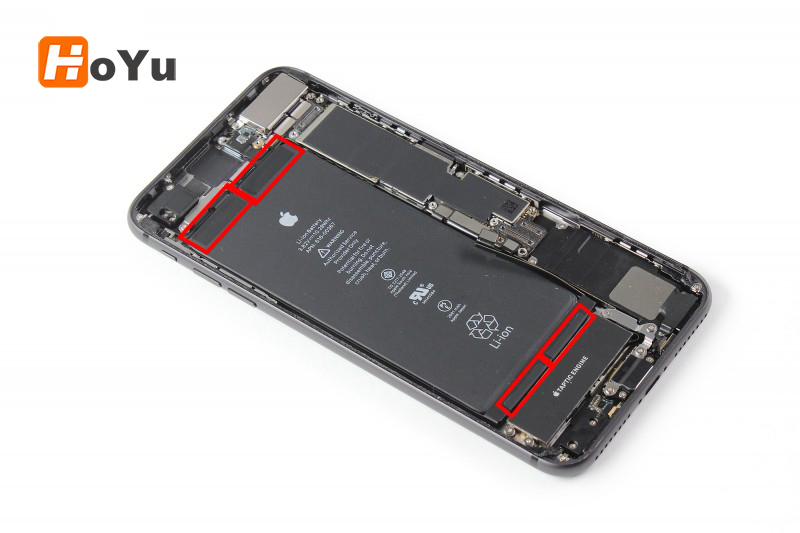
Step 12
Find the four adhesive taps that secure the battery.
Those adhesives enable the battery removal.
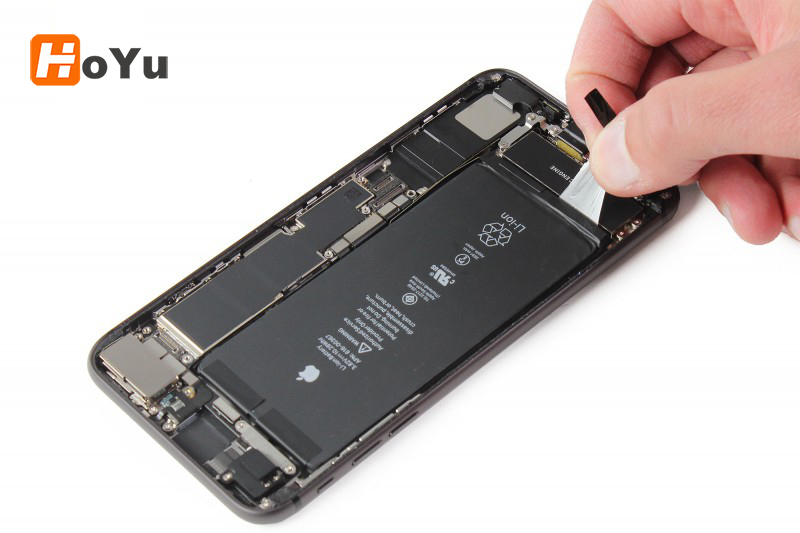
Step 13
Grab the adhesive strips one by one, pull on it.
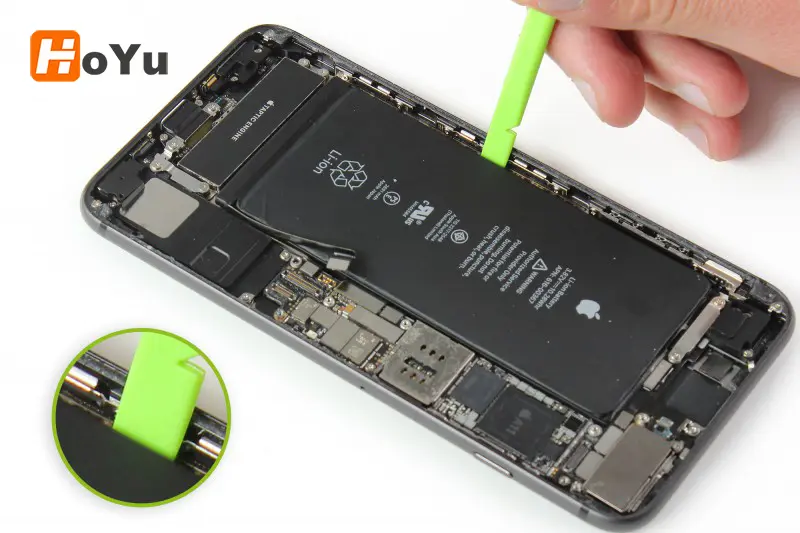
Step 14
Once they're removed, you can take off the battery.
Use the nylon spudger to lift it.
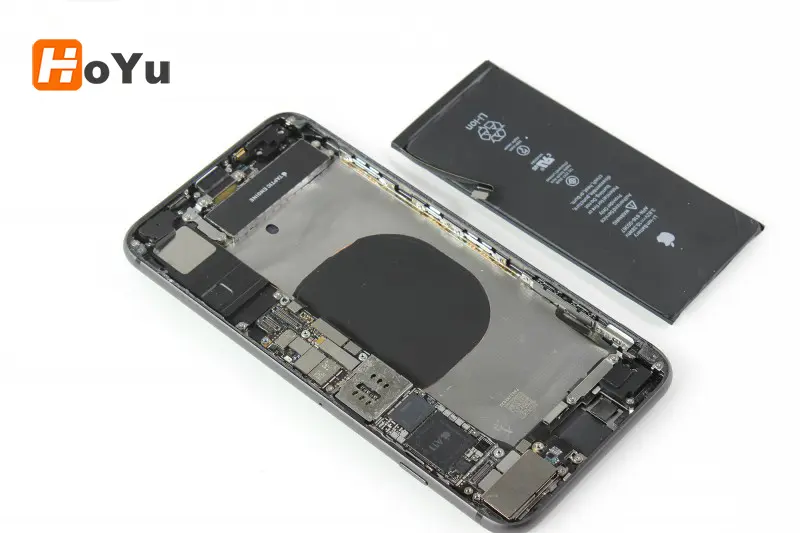
Step 15
The battery of your iPhone 8 Plus is now disassembled.
You can replace it with a new one if needed.